Firmware Updates with Dell OpenManage Essentials (OME)

By admin, April 9, 2012 7:42 pm

The device discovery part turns out to be much easier than expected, probably due to the firmware on all my hardware has been updated recently and snmp has been setup correctly as well.

After you set the IP range and snmp community strings under Discovery and Inventory, OME quickly collects all the Poweredge Servers, Equallogic Arrays, PowerConnect Switches, PowerVault  Arrays as well as finding the corresponding iDrac and OpenManage address automatically.

In fact Dell OpenManage Essentials (OME) is simply a central portal that collects every device in your network, you can view and manage them from one window and best you can receive server fault alert via email, it serves the same purpose as the previous long live Dell IT Assistant but MUCH BETTER!

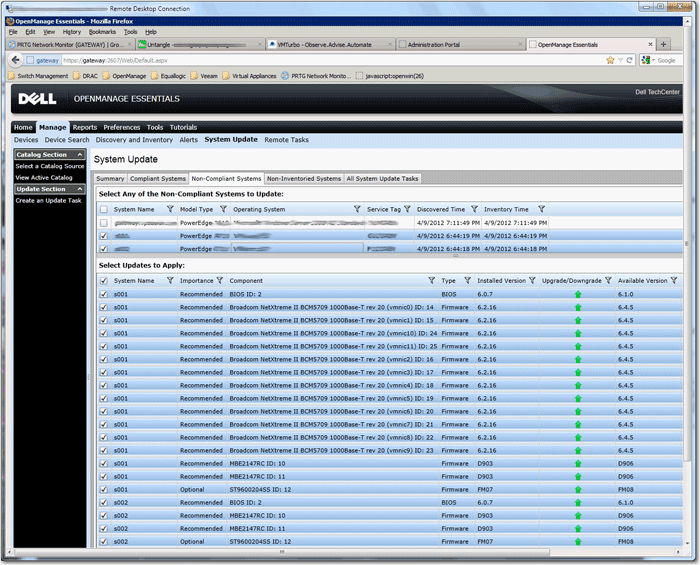
One of the Best Feature IMOO is System Update (BIOS/Firmware) under Manage for your ESX servers, it automatically pulls the latest firmware catalog from Dell’s FTP and compares with your server firmware level and list out all the latest one for you to choose from, it even pull the hard disk firmware to be precise!

I haven’t test and perform the update yet, but I guess it’s the same theory that System Update will ultilize iDrac and USC to patch your system’s BIOS and various firmware, but I guess it won’t automatically put your ESX to maintenance mode first, for that I think you need to manually do it yourself.

So there is no need to use Repository Manager any more, saving lots of time to build your own catalog and no need to use Dell Management Plugin for VMware vCenter (DMPVV) – that’s why I’ve been emphasizing Dell should make it free of charge.

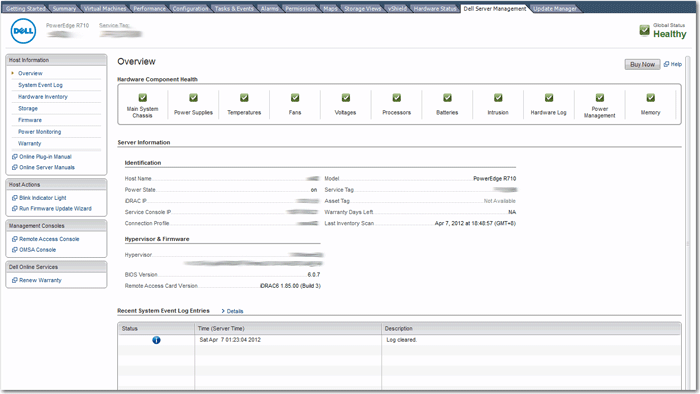
Some other interesting features including OME can automatically pull the Warranty Information based on Service Tag it gathered from Dell and report very detail hardware information regarding the servers in its inventory.

Finally some words about License Manager that includes with OME, I found it will collect all your iDrac 7 license information and manage from one console. Howerver, it works for 12the generation Poweredge Server and iDrac 7 only which I don’t have any currently, so I’ve uninstalled it.

Btw, since when does Dell start to copy HP and charge remote console KVM license just like iLo? :)

Anyway, I do think Dell OpenManage Essentials (OME) will replace ITA shortly (in my case, I think I will get rid of ITA tomorrow) and it’s a solid management tool for every Dell server administrator.
ome

Update April 14, 2012

I’ve completely re-configured everything on OEM, it’s much easier and most importantly, it discover the inventory and SNMP traps much faster than IT Assistant, so my ITA can finally retire. Thank you very much Dell for making a great product for free!

Update April 18, 2012

How to Configure SNMP Trap Destinations on Linux Server

For OpenManage Essentials to display alerts for a device, you must configure the device to send traps to the OpenManage Essentials server.

To configure a trap destination:

1. Open the file for editing:
/etc/snmp/snmpd.conf

2. Add the following line to the file:
Trapsink <OME IP Address> <community name>

where IP_address is the IP address of the management station and community_name is the SNMP community name

3. To enable the changes, restart the SNMP agent:
/etc/init.d/snmpd restart

Note – this step is only needed once after all configuration changes are completed.

Update June 23, 2021

After almost 10 years, the latest OME Catalog.cab update cannot be applied due to format has been changed for OME version 1.01 as it always falsely shows the latest signature is 03/06/2012.

Originally I thought the only way to update it is manually download the latest update signature from https://downloads.dell.com/catalog/catalog.cab, then use Select a Catalog Source > Use repository manager file, browse to the saved catalog.cab.

But it turned out the catalog format has been changed since, so only solution is to get the latest version 2.5 (1GB size).

In fact OME (OpenManage Essentials) 2.5 is going to be the last version, and moving to OpenManage Enterprise for DellEMC devices.

HIT/VE, ASM/VE and VMware Thin Provision Stun (Equallogic FW v5.2.2) on ESX 4.1

By admin, April 9, 2012 1:11 pm

In case you don’t know, VMware Thin Provision Stun is actually the 4th VAAI feature but it was hidden during its release time in the end of 2010. In case you also don’t know (this is not directly related though), I just learn that VMware’s HA technology is actually from Legato which EMC (VMware’s parent company) acquired back end.

Since then storage vendors start to integrate this great feature with their firmware upgrade following in 2011.

Equallogic incorporated this VMware Thin Provision Stun starting in firmware v5.1, but somehow I found it was hidden even as early as in v5.0.2, it worked out of box even with ESX 4.1.

I didn’t notice much difference in the volume properties under Group Manager after I upgraded PS6000XV to firmware v5.2.2. It was rather at a later time when I added a new volume using the HIT/VE (required FW v5.1 and above as well as MEM v1.1.0), I discovered there was an extra option (Enable VMware Thin Provision Stun) to create the volume with VMware Thin Provision Stun.

03

Double checking: Log to EQL Group Manager, then volume property has a new line now

TP warning mode: Leave online, generate initiator write error

01

You can also verify this by creating a testing volume again using EQL Group Manager, Thin provisioning modes options are selectable now in the new Equallogic firmware.

02

Oh…many may ask what does this thin provision stun do exactly? Well, basically when your Equallogic thin volume runs out of space (ie, maximum in-used space reaches 100%), instead of putting the whole volume offline and letting all VMs crashed on that volume, it will now ONLY suspend those VMs requiring more space continuously. On the other hand, for those VMs on the same volume don’t require more space for the time being, they can keep on working without any problem.

Region Capture

Back to the HIT/VE installation, the whole setup process is pretty simple, only catch is you need to create a new port group on iSCSI vSwtich in order for HIT/VE to access the Equallogic array. This may consider not secure by many system administrators.

One thing I really liked besides VMware Thin Provision Stun feature is ASM/VE. It OFFLOADS the backup process from ESX or vCenter Windows Server to Equallogic array itself, think of it as some kind of VAAI offload for backup. Veeam’s approach is to offload the backup to it’s backup proxy, but Equallogic internal backup (snapshots) is still way faster, well if you have the luxury space to spare that is of course.

The result (smart copy = snapshot) still stored on your Equallogic box, to many this is not wise, as to store the cold backup data in the expensive SAN doesn’t make sense (you can’t store it outside the volume which is being backed up, so if your volume is RAID10 or SSD, you have to store the snapshots in that volume as well, is it true any more? May be I’m wrong).

There is no way to store the snapshot off host as well. (may be there is, I saw one white paper showing how to use Symantec Backup Exec to offload the snapshots from EQL box with ASM/VE)

Oh, there is another great feature of ASM/VE: Smart Clone! It does have its real unique value! It’s extremely useful for application testing or testing a major patch to your VM.

Finally I really like HIT/VE GUI which is very simple and intuitive! To config an Equallogic new volume via HIT/VE is a piece of cake now, it will create everything for you automatically, no more manually configure iSCSI initiator access, VMFS rescan and attach volumes to ESX hosts, etc. A newly created VMFS will be ready within 5 clicks, that’s the beauty of Equallogic and guess what? It’s free of charge as usual!

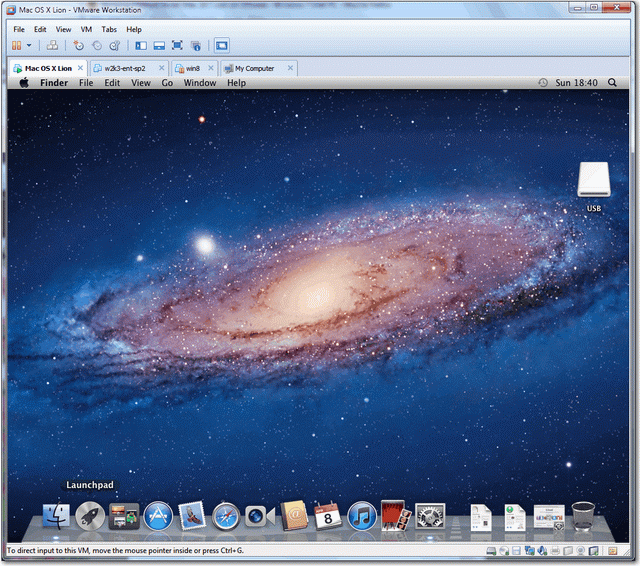
Running Mac OS X Lion 10.7.3 on VMware Workstation v8.0.2

By admin, April 9, 2012 1:50 am

The installation is pretty easy once you found the correct link, also here. In fact, there is no installation involved as the VMFS has already been fully configured. All you do need to search for VMware Tools for Mac OS X, put it to USB stick and install from within the VM.

I gave the maximum configuration for Mac OS X: 2 vCPUs with 2 cores each, so total 4 vCPUs and 8GB ram, it runs so smooth almost like native, and lightning fast on SSD, it only took 5 seconds to boot into the following screen. The good thing is I can run it in full screen, watch HD movies, play games, download apps. I noticed CPU loading on my Optiplex 990 SFF i5-550 is almost 90% across all 4 cores when full loading the VM.

I haven’t touch Apple’s OS for almost 12 years, it’s exciting to see the familiar face again in a virtual world.

I really start to love VMware Workstation as the unlimited possibilities it can do, next targets will be nested hypervisors, esx5 cluster, view 5 and plugin my iPhone to this Mac VM and use iCloud to sync stuffs, Cool!

macosx

Thoughts about Dell Management Plug-In for VMware vCenter (DMPVV)

By admin, April 9, 2012 12:12 am

Honestly, I have repetitively deployed DMPVV mutiple times in order to get it right.

Region-Capture

1. You really need to make sure you have read Dell OpenManage Software Compatibility Matrix before installing any OM software because you need to upgrade the firmware for BIOS/iDrac/Lifecycle to their respective minimum requirement as stated in the guide.

2. DMPVC DOES NOT NEED to use a DHCP server

I even created a W2K8 R2 DHCP server, but found there is a place in menu for me to configurate the fix IP for the appliance.

3. DMPVC cannot start in vCenter saying some wired permission problem, things like Access Denied!

The problem is because I registered the vCenter using IP in DMPVV, but used host name when I login with vSphere client, after I changed hostname to IP, everything worked. Probably it’s my DNS not working properly, anyway, IP is fine for my case.

4. Connection Profile doesn’t work, then I found out you have to turn on Remote Enablement during the installation of OMSA on ESX.

The reason you see that error message about “OMSA is not installed” could be due to that when you installed the OMSA, you didn’t install it with -c option which installs the “Remote Enablement” component of OMSA. And our appliance talks to OMSA thought its remote enablement layer. Without successfully connect to OMSA, the iDrac connection will fail too as we correlate the correct iDrac IP with the server by getting the iDrac IP from OMSA first. Please reinstall the OMSA with –c option and that should solve your issue. Once you pass the connection test from the connection profile, please make sure to run inventory from the Job Queue by clicking the “Run Now”.

That indeed was the fix, and the -c is listed in the user guide for the command line, however there is no explanation in the user guide why it needs to be there, so I did not re-run the OMSA 6.4 installer. Perhaps the OMSA team could add the -c switch to the -x (for express) switch for OMSA, so that it is automatically included? Also according to the OMSA 6.4 install manual, if you run the -x switch it runs the express setup with all options included and ignores any other switches, apparently this is not true.

For OMSA 7.0

Run the following command to perform an express install with Remote Enablement parameters:
sh linux/supportscripts/srvadmin-install.sh -c -x

-c is for Remote Enablement
-x is for Express

Then start the applicable services by running the following command:
sh linux/supportscripts/srvadmin-services.sh start

5. License Disappeared

Sometimes after a reboot or DMPVV reset to factory default, license disappear, I have to re-deploy the whole thing again, well, the last successful re-install only took me 5 minutes as I have done it over 6 times. :)

6. CANNOT contact iDrac (SOLVED, but UNSOLVED for the time being)

My iDRAC subnet is on a separate switch, so COS Service Console obviously won’t work, this was by design as I want to physically separate all network segments, and it’s not routable. I knew in order for default DMPVC to work is to put COS and DRAC network on the same network segment which is NOT SECURE as far as I concern. Why doesn’t DMPVV give us an option to specify the subnet for iDrac and add another network adapter for this purpose?

During the research, I also found out by using Alt+F2, login as readonly with default admin password, then you can perform some network trouble shooting such as ping and tracepath.

Anyway, I still can’t figure out a way to route the traffic from DMPVC to iDrac via vCenter server without using a L3 router or firewall device. Is it possible to use route add on vCenter Windows server to redirect the DMPVV traffic to iDrac? If you know, please let me know.

So I was not able to test the firmware upgrade feature, but I am 100% sure it’s utilizing iDrac’s USC firmware updating feature to fetch firmware from ftp.dell.com and then perform the upgrade on the background, it’s the same as if you reboot the server and press F10 USC.

7. Service Temporarily Unavailable

DMPVC web server always crashes, probably due to I gave it 1GB (reduced from 3GB), after I changed to 2GB, it stopped crashing, but still loading the host page is extremely slow, around 2 minutes. Oh, DMPVV is a resource eater,taking up 2GB of ram fully and 100% CPU cycle when it’s connecting to the host.

The server is temporarily unable to service your request due to maintenance downtime or capacity problems. Please try again later.

Apache/2.2.3 (CentOS) Server at xxx.xxx.xxx.xxx Port 443

8. Proxy to get firmware

This is the same issue as the above pt 6, see it’s going to bite back anyway, there is no direct connecting to Internet from within DMPVV, so you have to use a proxy server to download firmware, a better way would be adding a 3rd network adapter and connecting to your External port, hope this can be changed in the next release.

Finally, some good readings (total 3 parts) can be found on Virtual Life Style web site.

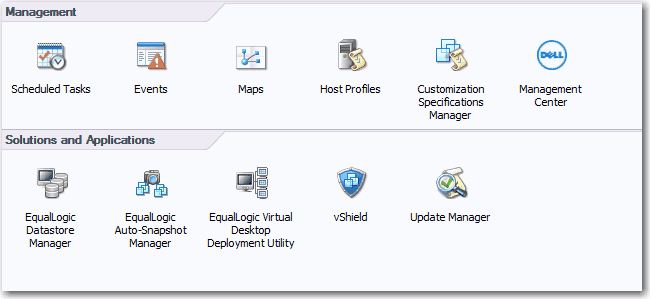
One of the coolest features I want to highlight is the PXE-less provisioning of the hypervisor to a physical server. This uses a combination of the Lifecycle Controller and iDRAC to deploy an installation ISO to the server. And since it is really tightly integrated with the VMware stack, the host is added to vCenter and configured using Host Profiles automatically, resulting in a true zero-touch deployment of a server. How cool!

In fact, there is a How to video regarding “Auto Discovery & Hypervisor Deployment – Dell Management Plug-In for VMware vCenter ”

One last word to add, I do think Dell Management Plug-In for VMware vCenter (DMPVV) is simply a proxy between ESX host and vCenter, still it should be made free as all the features of DMPVV can be achieved using different Dell server management products together. DMPVV is just a fancy toy that made all of them into a single product instead.

FYI, 12th generation servers such as R720/R620 doesn’t have to use OMSA as it it’s completely agent-less and no longer depends on OMSA agents within ESX hosts in order for DMPVV to work.