Category: Equallogic & VMWare (虛擬化技術)

A Huge Complex Upgrade Task Became A Piece of Cake with Virtualization and Equallogic!

By admin, July 11, 2011 10:31 pm

Today, I found Symmantec Antivirus has stopped updating its definition again due to space shortage, and I’ve tried everything to squeeze the last drop of space from my w2k3 without success, the original installation was back to mid-2004, at that time, 5GB is more than enough for the root C: dirve.

However after almost 7 years with all the patches and installed programs, it gradually filled up the C: drive to about 500MB left, so this leaves me no choice but to take the risk by using Acronis Disk Director to expand the partition.

First, I took a snapshot of the powered down VM, and then Edit the VM property and found the disk size has been gray out! Why? I don’t know, but after deleting the snapshot, I was able to expand the disk again, then took a snapshot again just to make sure.

Boot into Acronis Disk Director and I found there was no disk found due to SCSI controller was Paravirtual, changed to LSI Logic Parallel (LSI Logic SAS didn’t work) solved the problem, and the rest expanding the partition was just a piece of cake! I later found out there is no need to use Dell’s ExtPart utility as Acronis Disk Director did it all for me.

The interesting part was when Acronis Disk Director moving the blocks, it estimated 30 mins to re-arrange a 50GB partition, but at the end it only took less than 8 mins to complete the whole job, thanks to Equallogic’s fantastic 15K RPM Raid 10 IOPS capability! (Average Read/Write is about 2,000 IOPS, it’s quite high for two on-going parallel jobs)

Just to be cautions, if there is anything goes wrong, I still have the snapshot, the backup from Acronis True Image Server as well as my last resource Veeam backup, so it’s pretty safe to do the above with 3 different kind of backup on hand. Of course, I always forgot to mention there is the 4th hidden backup, it’s the Equallogic snapshot, but it’s the very last resource if all 3 backup methods failed to restore.

One more thing to take care of is the left over snapshot as I found the VM disk type automatically became Thick from Thin, this is due to the snapshot in the previous step, simply remove it will revert the disk to Thin again, nothing to worry about, but the removal process surprised me as it did took quite a long time to complete, if you know why, please let me know.

Boot up the VM and everything is back to order again. Back in the old days, when we perform a disk space upgrade, we often need to use Acronis True Image to clone all the partitions, then take out the old disks, normally raid 5 with 3 disks, and then insert 3 bigger size disks again and create a new raid 5 volume, finally restore it using CD-ROM, the whole process can take up to 4-5 hours to complete if you are lucky and need to cross your finger to pray no bad things happened!

Wow! I must admit that I love the benefits of virtualization and the magic of Equallogic more and more everyday!
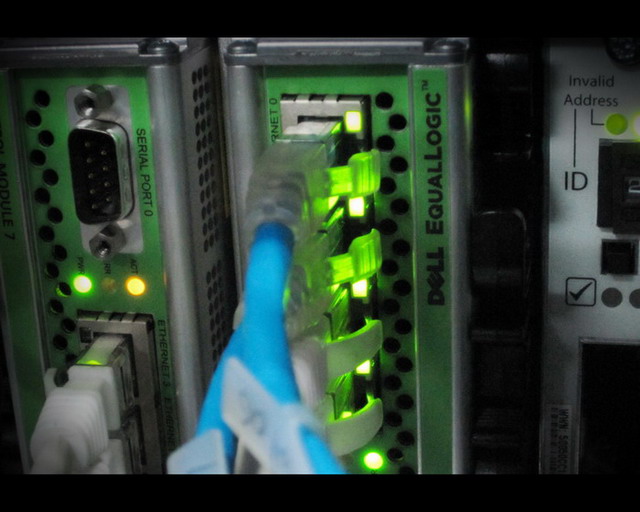
Nice Flashing Equallogic with LOMO Effect

By admin, June 14, 2011 2:32 pm

eql03

eql02

Limited Bandwidth / Speed Cap on VM is Easy!

By admin, June 4, 2011 10:46 pm

In order to prevent some abusive clients using all the bandwidth you’ve got, we need to have some kind of capping ability, it was done on our physical switch before, but since we are moving everything into virtual world, we now have a much better and flexible weapon on ESX 4.1. Btw, I don’t know why VMware got rid of the nice traffic shaping capability on individual VM like in the old days (ESX 2.5).

The step is actually very simple, just create a bunch of speed limit/capping port groups, I named them External – 1Mbps, External – 2Mbps, etc, setup VLAN or not is according to your own environment. Then go to each port group, click Traffic Shaping, then Enable, that’s it!

For example, you want to limit a VM with 1Mbps, what you need to set is 1000kbps for Average, 1000kbps for Peak (this eventually makes zero room for burst), 1 Byte for Burst if you like.

You may have more fun with Peak and Burst Size, for example, you can set Average to 500kbps (ie, 0.5Mbps), then you can give 1000kbps for Peak and 8000 Bytes for Burst, this means you actually allow the VM to go up to 1Mbps at peak in step of 64kbps burst size (ie, 64kbps, then burst adds up to 128kbps, then 256kbps until reaching the total peak of 1Mbps from the average 0.5Mbps)

Since the traffic shaping policy applies to each individual vNIC connecting to the same Port Group, this means if you have two vNICs on the same VM, then this VM will get TWICE the capped bandwidth than a VM with only one vNIC.

Finally, the traffic shaping is only for outbound only, if you need inbound, then you need to use vDS and in that sense you need to have Enterprise Plus version.

SSLExplorer Virtual Appliance: Couldn’t Get It Working

By admin, May 22, 2011 1:42 am

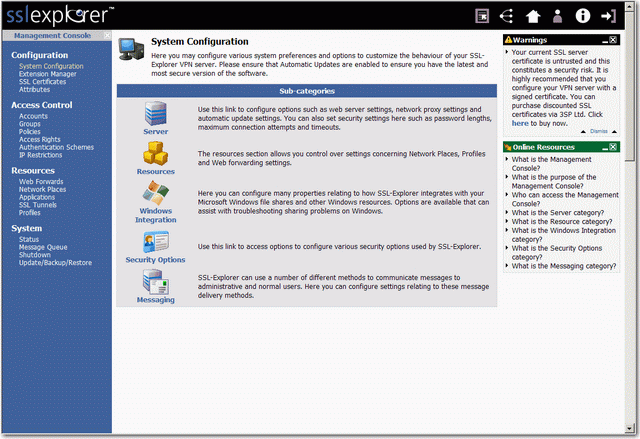
I thought I have found another nice and Free apps for SSL-VPN, SSLExplorer, now a Barracuda company, but it turns out it’s been stopped updating since 2008 and configuration part is too difficult.

1. Use VMware vCenter Converter 4.3 to import the virtual appliance (sslexplorer-1.0.0_RC17-x86.vmware.tgz) and converted it to VM Version 7 on ESX 4.1, it took about 15 seconds.

2. Open console, login as root with no password and configure the management interface with an INTERNAL IP address as public IP won’t work for some reason. (wasted 2 hours on this part)

3. Follow the wizard, start the sslexplorer service and the point your browser its IP address, configured many things until step 4.

4. Unable to publish sslexplorer port 80 & 443 via Untangle UTM. (wasted 2 hours on this part)

Finally Give up after 4 hours!

sslvpn 


Update May-22 3PM

Figured out why Step 2 doesn’t work, because I enter the wrong CIDR format for Network and my mind isn’t clear at all after 12AM! Damn!

It’s been explained clearly in the sslexplorer manual:

Network: Network address for this subnet in CIDR format. In the screenshot above a private subnet of 192.168.70.10/24 has been created. This is the same as using 192.168.70.10 with a subnet mask of 255.255.255.0 which will provide 256 hosts (254 useable addresses as 192.168.70.10 is the network address and 192.168.70.255 is the broadcast address).

What I did was 255.255.255.0/24 or 192.168.70.0/24 which is obviously wrong, the correct format for Network (or netmask) really should be 192.168.70.10/24, no wonder! Forgot the most basic could cost an eye or a leg in some case is true!

ANYWAY SOMEHOW STILL DOESN’T WORK!


Update May-22 5PM

The Network Setup Wizard contains A BUG FOR NETMASK PART, so I manually edited /etc/sysconfig/network-scripts/ifcfg-eth0

SIMPLY CHANGE NETWORK=192.168.70.10/24 to NETMASK=255.255.255.0

You can verify this by ping to Google, if it works, then it’s been correctly setup!

Finally, found the pre-built VM missing GCC compiler so can’t upgrade VMware Tools, as well as missing traceroute, strange!

I guess that’s all the fun and pain for a Free and Community based software, actually I start to like it which is gain pleasure from most dreadful painfulness: )

After that, everything worked, so simply give it a public IP and configure the rest will have your SSL-VPN ready in less than 10 mins. Of course putting it behind Untangle has no problem as I’ve got the NIC interface setup correctly this time!

So the best solution is not to struggle with the problem, but go to bed early! After a good night sleep, suddenly, BINGO!  Still No Pain No Gain, after almost 6 hours, it’s been trimed down to a 15-20 mins job.

Untangle is Finally Up and Running!

By admin, May 19, 2011 10:17 pm

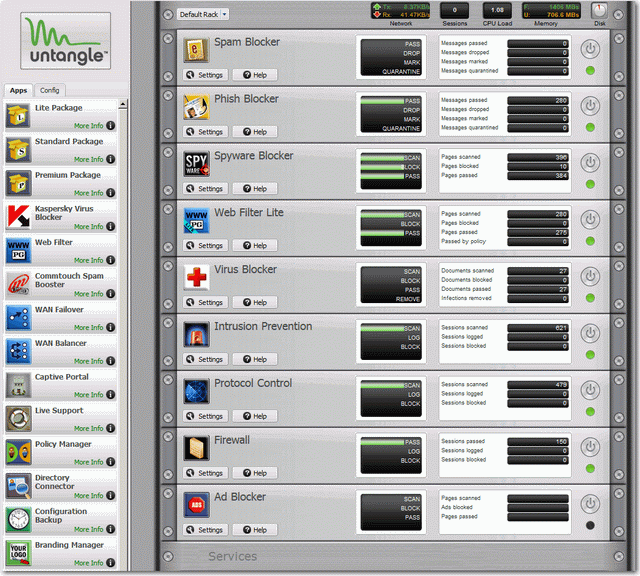
I really start to like this FREE virtual appliance from Untangle, it’s basically an UTM with almost everything you need, not to mention the nice looking GUI, it’s highly recommended for any SMB who seeks for an ultimate all-in-one network protection solution!

untangle

vCloud Usage Meter

By admin, May 8, 2011 2:37 pm

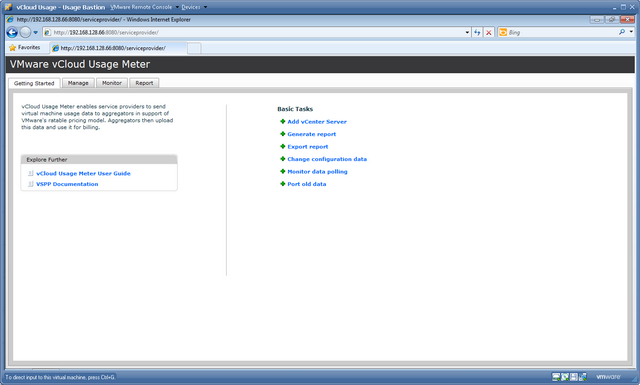
The installation of vCloud Usage Meter OVF Appliance is very easy, just remember to assign its network NIC to your vCenter subnet and then browse to http://vCloudUsageMeter:8080/serviceprovider, add vCenter and configure all the email settings.

I found vCloud Usage Meter is very useful even you are not using vCloud Director, it serves as a good measurement of your virtual infrastructure and you can generate reports to have a better understanding of your VM usage, best of all, it’s a free!

vum

Free Tools from VKernel

By admin, May 4, 2011 4:52 pm

It seemed the market for 3rd party virtualization tools is really heating up, this time it’s VKernel offers some free apps for those who love every bites of those nice looking GUI based tools.

  • ApplicationVIEW
  • CapacityVIEW
  • StorageVIEW
  • Capacity Modeler 

I’ve tried them all, well, it does what it suppose to, which is just to give you a very preliminary of what your current virtual infrastructure is and also present you some problems it discovered, to get into more details, you have to pay as expected. Well, to some extend, I don’t like VKernel’s free tools, as they are really does nothing but to get you into buying their products, by contract, Veeam is doing much better for the free products that’s actually useful, so I’ve uninstalled all 4 after 30 mins of testing as I found they are really not useful at all.

A few years back, I was seriously consider buying VMkernel’s chargeback product as it’s more advanced than VMware’s chargeback product, but both contains flaw and drawbacks. After almost 3 years, I still don’t see anyone on the market offers a good cloud based chargeback/billing panel for easy to use and customize to individual company’s requirement, if you know any new comer, please drop me a line, thanks.

Problem: Untangle 8.1 OVF and ESX 4.1 in Transparent Mode

By admin, April 29, 2011 2:55 pm

I’ve read the Wiki page for installing OVF on ESX and failed once already because I bridged the vNICs on the same vSwitch without using VLAN, so eventually I crashed my network as looping started to occur.

So this is my second attemp, please refer to the picture I’ve attached, hope you can give me some advice and suggestions.

1. So basically, I have ONE vSwitch with TWO physical NICs binded together to have Load balancing and failover.

2. Within, I have THREE Port Groups:
- External (no VLAN) connects to Internet
- Untangle DMZ (VLAN 21) – Useless as I will use Transparent Mode
- Untangle Internal (VLAN 22) – where I put VMs that I want to protect behind the Untangle.

Is the following concept correct?
1. When I use Untangle in Bridge or Transparent Mode, I will ONLY utlilize two interfaces External (no VLAN) and Untangle Internal (VLAN 22), so these are the two vNICs Untangle VM will connect to. This leaves Untangle DMZ useless, so I can remove it from VMX or VM configuraiton GUI?

2. I Understand I need to enable Promiscuous Mode in order to have Untangle to scan the network in transparent mode (ie, a sniffer that is), (side topic: Do I need to have Promiscuous Mode if I am using Route Mode?)

I understand I need to enable Promiscuous Mode on Virtual Switch Level (ie, toppest level), which I DON’T WANT to due to security reasons (ie, VM behind Untangle can sniff the whole network right?), Can I enable Promiscuous Mode in individual Port Group Instead?

If Yes, the ONLY Port Group need to have Promiscuous Mode enabled is Untangle Internal (VLAN 22) right? Where it is the Port Group all the VMs are going to connect to. I do not need to enable Promiscuous Mode in External (No VLAN), is this correct?

Or I HAVE TO ENABLE IT on vSwitch level? but why? I thought individual Port Group will OVERWRITE the default setting, NO?

But wait, no matter where I enabled the Promiscuous Mode (ie, vSwitch level or Port Group level), the risk is still here, can I say I am allowing all the VM to have the capability to sniff traffic on the network? If yes, this is absolutely NO GOOD in using Untangle as enabling Promiscuous Mode will open a big security hole in L2 (ie, enabling Promiscuous Mode will render my switch to a hub)

3. FYI, the TWO PHYSICAL NICs (ie, vmnic8 and vmnic0) are connected to the same physcial L2 switch. VLAN 21 AND VLAN22 have been configured on this physical switch as well, also VMware VST VLAN tagging is used on the Port Group. I wonder if my current configuration will STILL create a loop that will crash my network again? (I don’t see how it can, but really want to double make sure and confirm with you guys)

4. Where is the management interface for Untangle going to be in this case? Do I need to create a new port group say Untangle – Management VLAN 23, and also add a new vNIC (probably just use the one for DMZ) and then connect to this Untangle – Management port group.

untangle[1]

Update May-1-2011

Now I understood Port Group with VLAN VST Mode won’t work with Untangle and confirmed again with what’s on the Wiki, the document said it clearly “Each vSwitch should be connected to it’s own Physical NIC, or at least be separated by VLAN tagging at the physical NIC level. ” (ie, on the Physical NIC level and the picture attached above also confirmed this).

So does this mean Promiscuous Mode for bridge mode can ONLY work on Virtual Switch Level, but not Port Group Level?

Um…it’s quite disapointed as I gradually found out Untangle on ESX has so many limitation (ie, no VLAN tagging, must enable Promiscuous Mode for vNic connecting VMs, must have Promiscuous Mode on vSwitch but not on Port Group).

So I have decided to use Route Mode now to aovid the above limitation now.

Since I don’t have any more physical NIC to spare, can I create an internal vSwitch (ie, WITHOUT NIC) for Untangle VM ?

ie, External > Untangle External > Untangle Internal (which is on the internal vSwitch without NIC) and all the VM will be on this same internal vSwitch, which will be all protected by Untangle that is.

This will work right? Anyone Please?


Update May-19-2011

Finally, I’ve got Untangle 8.1 OVF working under ESX 4.1 in route mode, the solution is very simple:

1. Simply remove the last NIC in VM configuration, this will get rid of the DMZ NIC, leaving only External and Internal NICs. These two NICs are exactly what Route Mode requires.

2. Assign External NIC to your external connectivity to the Internet, and Internal to a seperate Port Group (in my case it’s VLAN 20 – Untangle)

3. Reboot Untangle, now, you won’t be able to use the default admin/passwd to login, it’s ok, just reset it, after successfully login to the console, configure the statics IP for both External and Internal.

That’s all you need, simple and neat! and I am really starting to fall in love with Untangle’s GUI, they do look so much cooler than my dull Netscreen’s GUI.

100% VM CPU in ESX Performance Tab but Task Manager Shows None

By admin, April 24, 2011 11:23 am

Yesterday, I tried the cpuid.coresPerSocket setting on a testing W2K3 Web Edition VM (plain install, no SP), I set cpuid.coresPerSocket = 4 with 8 vCPUs and I was able to boost the VM to 8 CPUs in task manager (ie, 2 sockets with 4 cores on each sockets), then I remove the cpuid.coresPerSocket parameter from .vmx and reduce the vCPU to 1, problem started to occur after reboot the VM.

Veeam Monitor and ESX Performance Tab started to show CPU over usage alarm and CPU stayed at 100% no matter what, I even remove the VM from Inventory as added it back again as I though it may solved the problem, nothing worked until I found VMware KB1077.

However there is no option in Device Manager > Upgrade Computer HAL to change from Multiprocess HAL to Uniprocessor HAL prior W2K3 SP2, I do have a little program to do it, but I forgot where I put it, so I simply upgrade the VM to SP2 and all the problem disappear after reboot.

I don’t think this will occur in W2K8, probably only happen in old OS like W2K, W2K3 prior SP2, so all you need to do is to select the correct processor HAL for your VM.

What’s New in vSphere 5.0

By admin, April 22, 2011 11:14 am

Content has been removed by the request of VMware on Apr. 28, 2011.

Pages: Prev 1 2 3 4 5 6 7 ...11 12 13 ...16 17 18 Next