Category: Network & Server (網絡及服務器)

PS6000XV MPIO and Disk Read Performance Problems Again!

By admin, October 2, 2010 1:26 pm

A Quick question before even going into the following:

A Single Equallogic Volume IS LIMITED TO 1Gbps bandwidth ONLY at Max? (ie, The volume won’t send/receive more than 125MB/sec even there are MPIO NICs and iSCSI sessions connected to it) Does this apply to a single volume within just one member or it can break the 125MB/sec limit if the volume spans across 2 or more members? (for example 250MB/sec if the volume is spread over 2 members)

Summary (2 Problems Found)
a. PS6000XV MPIO DOESN’T work properly and limited to 1Gbps on 1 Interface ONLY on Server (initiator side)
b. 100% Random Read IOmeter Peformance is 1/2 of 100% Random Write


Testing Environment:

a. iSCSI Target Equallogic: PS6000XV 1 array member only, loaded with Latest Firmware 5.0.2 and HIT 3.4.2, configured as RAID10. (16 600GB SAS 15K Disks), HIT Kit and MPIO is installed properly, in MPIO, MSFT2005iSCSI BusType_0×9 is showing besides EQL DSM.

b. iSCSI Initiator Server: Poweredge R610 with latest firmware (BIOS, H700 Raid, Broadcom 5709C Quad, etc)

c. iSCSI Initiators: Using two Broadcom 5709C (one from LOM, one from add-on 5709C Quadcard), using Microsoft
software iSCSI Initiator (not Broadcom hardware iSCSI Initiator mode that is), No Teaming (I didn’t even install Broadcom’s teaming software as I want to make sure the teaming driver doesn’t load into Windows), I’ve also disabled all Offload features, as well as disable RSS and Mode Interruption, I have enabled Flow Control to “TX & RX”, as well as set Jumbo Frame MTU to 9000 (log in EQL group manager event that the initiator is indeed connecting using Jumbo Frame), each NIC has a different IP in the same sub-net as the EQL group IP.

d. Switches: Redundant PowerConnect 5448, setup according to the best practice guide, Enabled Flow Control, Jumbo Frame, STP with Fastports, LAG, Seperate VLAN for iSCSI, disabled iSCSI Optimization and tested redundancy is working fine by unplug different ports and switch off 1 of the switch, etc.

e. IOMeter Version: 2006.07.27

f. Windows Firewall has been turned off for Internal Network (ie, Those two Broadcom 5709C NICs sub-net)

g. There is no error at all showing after a clean reboot.

h. Created two Thick volume (each 50GB) on EQL and assigned iqn permission to the above two NICs iSCSI name.
Using HIT kit, we define MPIO to “Least Queue Depth”, even with just one member, we want to increase the iSCSI session to volumes on that member, so we also set Max sessions per volume slice to 4 and Max sessions per entire volume to 12. So right away we see the two NICs/iSCSI initiators connects volume as 8 paths (2 paths for each NICs to a volume x 2 NICs x 2 volumes)


IOMeter Test Results:

2 Workers, 1GB test file on each of the iSCSI volume.

a. 100% Random, 100% WRITE, 4K Size
- Least Queue Depth is working correctly as all Interface is showing different MB/sec.
- IOPS is showing impressive number over 4000.

b. 100% Random, 100% READ, 4K Size
- Least Queue Depth DOESN’T SEEM TO work correctly as all Interface is showing equal/balanced MB/sec. (lOOKS Like Round Robin to me, but the policy has been set to Least Queue Depth)
- IOPS is showing 2000, which is 1/2 of Random’s IPOS 4000, STRANGE!

c. 100% Sequential, 100% WRITE, 64K Size
- Least Queue Depth is working correctly as all Interface is showing different MB/sec.

d. 100% Sequential, 100% READ, 64K Size
- Least Queue Depth DOESN’T SEEM TO work correctly as all Interface is showing equal/balanced MB/sec. (lOOKS Like Round Robin to me, but the policy has been set to Least Queue Depth)
All of the above test (a to d), the 4 EQL Interface reached total of 120MB/s ONLY, somehow it’s FIXED to one NIC on R610 only and MPIO didn’t kick in even I waited for 5 mins, so all the time there is only one NIC participating in the test, I was expecting 250MB/s with 2 NICs as there are 8 iSCSI sessions/path to two volumes.

I even tried to disable the active iSCSI NIC on R610, as expected the other standby NIC kick in immedaitely without dropping any packets, but I just can’t get BOTH NICs to load-balance the total thoughput, I am not happy with 120MB/sec with 2 NICs. I thought Equallogic will load balance iSCSI traffic between connected iSCSI initiator NICS.
 

SAN HQ reports no retranmit error at all, always below 2.0%, one error found though saying one of the EQL interface is saturated at 99.8% sometimes. (is this due to least queue depth?)


Findings (again 2 Problems Found)
a. PS6000XV MPIO DOESN’T work properly and limited to 1Gbps on 1 Interface ONLY on Server (initiator side)
b. 100% Random Read IOmeter Peformance is 1/2 of 100% Random Write


I read somewhere on Google saying EQL’s limit on each volume is 125MB/s:

“Though the backend can be 4 Gbps (or 20 Gbps on PS6×10 series), each volume on the EqualLogic can only have 1 Gbps capacity. That means, your disk write/read can go no more than 125 MB/s, no matter how much backend capacity you have.”

“It turns out that the issue was related to the switch. When we finally replaced the HP with a new Dell switch we were able to get multi-gigabit speeds as soon as everything was plugged in.”
and I don’t think there is anything wrong with the switch setting as we also connect two other R710 using VMware and we constant seeing 200MB+, so there must be some setting problem on R610.

Could it be:
a. Set MPIO policy back to Round Robin will effectively use the 2nd NIC (path)?
b. Any setting need to be changed on Broadcom NIC’s Advanced setting? Enable RSS and MOde Interrupt again?

Anyone? Please kindly advise, Thanks!

 (Note: Equallogic CONFIRMED THERE IS NO SUCH 1Gbps limit per volume)


Update:

Something changed….for good finally!!!

After taking a shower, I’ve decided to change my IOmeter to VM instead of using physical machine.

FYI, I’ve install MEM and upgraded FW to 5.0.2, I think those helped!

1st time in history on my side!!! It’s FINALLY over 250MB during 100% Seq. Write, 0% Random and over 300MB during 100% Seq. Read, 0% Random.

1. Does IOPS looks good? (100% RAMDOM, 4K Write is about 4,500 IOPS and Read is about 4,000 IOPS 1 Member only PS6000XV)

2. Does the throughput look fine? I can increase more worker to get it to the peak 400MB/sec, 300MB/sec for Read and 250MB/sec for Write currently

Now if the above 1-2 are all ok now, then we only left with 1 Big Question.

Why doesn’t this work in physical Windows Server 2008 R2? The MPIO load-balancing never kick-in somehow, only failover worked.


Solution FOUND! (October 8, 2010)

C:\Users\Administrator>mpclaim -s -d

For more information about a particular disk, use ‘mpclaim -s -d #’ where # is t
he MPIO disk number.

MPIO Disk    System Disk  LB Policy    DSM Name
——————————————————————————-
MPIO Disk1   Disk 3       LQD          Dell EqualLogic DSM
MPIO Disk0   Disk 2       FOO          Dell EqualLogic DSM

That’s why, somehow the testing volume Disk 2 has been set with a LB policy as Fail Over Only, no wonder it’s always using ONE-PATH ALL THE TIME, after I’ve changed it to LQD, everything works like a champ!


More Update (October 9, 2010)

Suddently it doesn’t work again last night after rebooting the server, this is so strange, so I doubl checked switch setting, all the Broadcom 5709C Advanced Setting, making sure all offload are turned off and Flow Control has been set to TX only.

Please also MAKE SURE under Windows iSCSI Initiator Properties > Dell Equallogic MPIO, all of the active path under “Managed” is showing “Yes”, I had a case 1 out of 4 path was showing “No”, then somehow I can never get the 2nd NIC to kick in and I also received very bad IOmeter result as well as the FALSE annoying warning of “Priority ”Estimated
Time Detected” Duration Status Alerts for group your_group_name
Caution 10/09/2010 09:54 4 m 0 s. Cleared Member your_member_name TCP retransmit percentage of 1.7%. If this trend persists for an hour or more, it may be indicative of a serious problem on the member, resulting in an email notification.”

Update again October 9, 2010 10:30AM

Case not solved, still having the same problem, contacting EQL support again.


More Update (October 25, 2010)

I’ve found something new today.

I found there is always JUST ONE NIC taking the load in all of the following 1-9.
No matter if I install HIT Kit, with/without EQL MPIO or just simply Microsoft MPIO, still just 1 NIC all the time.

1. I’ve un-installed HIT kit as well as MPIO, then reboot.

2. Test IOmeter, single link went up to 100%, NO TCP-RETRANSMIT.

3. Install latest HIT Kit (3.4.2) again (DE-SELECT EQL MPIO, this is the last option, as I suspect there is some conflicts, and I will install it later at Step 5), Test IOmeter 2nd time, single link went up to 100%, NO TCP-RETRANSMIT.

4. Install Microsoft MPIO, reboot, MSFT2005iSCSIxxxx is installed correct and showing under DSM, and NO EQL DSM device found as expected. Test IOmeter 3rd time, single link went up to 100%, NO TCP-RETRANSMIT.

5. Under MPIO, found there is no EQL DSM device, so I re-install HIT kit again (ie, Modify actually) with the last option MPIO select (that’s EQL MPIO right?), reboot the server.

6. Now Test IOmeter the 4th time, single link went up to 100%, 1% TCP-TRANSMIT!!!
(IT SEEM TO ME HIT KIT’S EQL MPIO IS CONFLICTING WITH MS MPIO something like that)

7. This time, I’ve uninstall HIT kit again leaving Microsoft MPIO there, before reboot, Test IOmeter 5th time, single link went up to 100%, STILL 1% TCP-RETRANSMIT.

8. Test IOmeter 6th time, single link went up to 100%, NO TCP-RETRANSMIT. with previous Microsoft MPIO installed, Now Re-install HIT Kit again with all option selected and Reboot.

9. After reboot, Now Test IOmeter the 7th time, single link went up to 100%, STILL 1% TCP-RETRANSMIT!!!

I GIVE UP literally for today only  but at least I can say the MPIO is causing the high TCP-TRANSMIT and poor performance when using Veeam Backup SAN mode. I intend not to un-install HIT Kit and remove EQL MPIO PART ONLY, but leaving all other HIT KIT components selected, so at least I am not getting that horrible TCP-TRANSMIT thing which really affecting my server.

Btw, I don’t think it matters if one of my nic is LOM on-board and one of the nic is on Riser as I did disable one at a time (1st disable LOM, test IOmeter, then disable riser NIC, then test IOmeter)  and run IOmeter, still getting 1-2% TCP-RETRANSMIT with HIT KIT (EQL MPIO installed), THAT IS ONLY 1 ACTIVE LINK WHILE OTHER LINK HAS BEEN DISABLED MANUALLY, I AM STILL GETTING TCP-RETRANSMIT.


So my conclusion is “So there must be a conflict between EQL MPIO DSM and MS MPIO DSM on Windows Server 2008 R2.”

I belive EQL HIT Kit MPIO contains or having A BUG THAT DOESN’T WORK WITH Windows Server 2008 R2 MPIO? I think all other W2K3 or W2K8 SP2 R2 ALL working fine, just not with W2K8 R2.

Finally, my single link iSCSI NIC is working fine, no more TCP-Transmit ever, speed is in 600-700Mbps range during Veeam Backup and it tops my E5620 2.4Ghz 4 cores CPU to 90%, so I am fine with that.  (ie, Better a single working path than two non-working MPIO paths)


More Update (December 22, 2010)

So far I was able to try the followings.

1. I’ve updated Broadcom’s firmware to latest 6.0.22.0 from 5.x.
2. Then I’ve Re-installed (Modify, Added back) MPIO module from latest HIT.
3. I’ve run the 1st command mofcomp %systemroot%\system32\wbem\iscsiprf.mof, but not the 2nd as http://support.microsoft.com/kb/2001997 says the 2nd command mofcomp.exe %systemroot%\iscsi\iscsiprf.mof is actually related Windows Server 2003 and I am running Windows Server 2008 R2.

Still the same result, this time TCP RETRANSMIT is over 2.5%, still just one-link being used. (ie, no MPIO)

However, I discovered something new this time as well:

As soon as I decrease the Broadcom NIC’s MTU to 1500 from 9000 (ie, No Jumbo Frame) on Poweredge R610, TCP RETRANSMIT has been reduced to almost 0% (0.1%), but still no MPIO (ie, still just one-link being used)

So the conclusion to my finding is:

The TCP RETRANSMIT seemed related to Jumbo Frame setting now, any idea of where the possible problem could be?

If it’s the switch setting, then how come my VM on the same switch can load up to almost 460Mbps without any TCP retransmit?

Probably it’s still related to W2K8 R2 setting and HIT Kit’s MPIO conflicts.


More Update (December 23, 2010)

Today, I was able to test Broadcom iSCSI HBA Mode according to EQL’s insturction as well, particularly disabled NDIS mode, leaving iSCSI only, and also discover the target using specific NIC, then enabled MPIO.

Unfortunately, there is just still a single link even with iSCSI HBA Mode, strange!

One thing I noticed however is the CPU indeed decreased from 8% to 2%, but considering my CPU is rather powerful, the cost in CPU when using software iSCSI initiator can be ignored.


More Update (January 20, 2011)

With the help from local Pro-Support team, the MPIO mulfunction problem has been identified FINALLY! It’s due to the RRAS service running the on same server causing the routing problem which will somehow disable the 2nd path automatically and causing high TCP-Retransmit.

I was also able to get both NICs load to 99% for the whole IOMeter testing period with NO TCP-RETRANSMIT after disabled RRAS Service, first time in 3 months! :)


More Update (January 21, 2011)

More findings from local Pro-Support team:

The issue has nothing to do with EQ, below is my testing:

I tried to capture package of ICMP with WireShark.

iSCSI1 IP 192.168.19.28    metric 266
iSCSI2 IP 192.168.19.128   metric 265   ( all traffics go through this NIC )

Using a server 192.168.19.4 to ping 192.168.19.28, from WireShark, monitor iSCSI1, it just shows REQUEST package, monitor iSCSI2, it shows REPLY package. That means an ICMP come in from iSCSI1 and come out from iSCSI2. It was routed by RRAS.

After disabled RRAS, it come in and out from iSCSI1.

I’m checking on how to disable this 2 NICs routing in RRAS. I’ll update you later. Thanks.


More Update (January 24, 2011) – PROBLEM SOLVED, IT WAS DUE TO RRAS CAUSING ROUTING PROBLEM TO MICROSOFT MPIO MODULE

More findings from local Pro-Support team:

After many times tested, It works in my lab by following setting.

1.  Install HIT kit and connect to EQL.
2.  Check the 4 paths corresponding to EQL 4 ports from 2 NICs.
3.  In RRAS -> IPv4 -> Static Routes, add 4 entries by above 4 paths.
a)  Netmask is 255.255.255.255
b)  Gateway is IP of NIC.
c)  Metric is 1

After setting, it resumes normal. 

Reboot test, wait from RRAS start up. Check traffic, normal again.
Equallogic Firmware 5.0.2, MEM, VAAI and ESX Storage Hardware Accleration

By admin, October 1, 2010 6:43 pm

Finally got this wonderful piece of Equallogic plugin working, the speed improvement is HUGE after intensive testing in IOmeter.

100% Sequential, Read and Write always top 400MB/sec, sometimes I see 450-460MB/sec for 10 mins for a single array box, then the PS6000XV box starts to complain about all its interfaces were being saturated.

For IOPS, 100% Random, Read and Write has no problem reaching 4,000-4,500 easily.

The other thing about this Equallogic’s MEM script is IT IS JUST TOO EASY to setup the whole iSCSI vSwitch/VMKernel with Jumbo Frame or Hardware iSCSI HBA! 

There is NO MORE complex command lines such as esxcfg-vswitch, esxcfg-vmknic or esxcli swiscsi nic, life is as easy as a single command of setup.pl –config or –install, of course you need to get VMware vSphere Power CLI first.

Something worth to mention is the MPIO parameter that you can actually tune and play with.

C:\>setup.pl –setparam –name=volumesessions –value=12 –server=10.0.20.2
You must provide the username and password for the server.
Enter username: root
Enter password:
Setting parameter volumesessions  = 12

Parameter Name  Value Max   Min   Description
————–  —– —   —   ———–

reconfig        240   600   60    Period in seconds between iSCSI session reconf
igurations.
upload          120   600   60    Period in seconds between routing table upload
.
totalsessions   512   1024  64    Max number of sessions per host.

volumesessions  12    12    3     Max number of sessions per volume.

membersessions  2     4     1     Max number of sessions per member per volume.


C:\>setup.pl –setparam –name=membersessions –value=4 –server=10.0.20.2
You must provide the username and password for the server.
Enter username: root
Enter password:
Setting parameter membersessions  = 4

Parameter Name  Value Max   Min   Description
————–  —– —   —   ———–

reconfig        240   600   60    Period in seconds between iSCSI session reconf
igurations.
upload          120   600   60    Period in seconds between routing table upload
.
totalsessions   512   1024  64    Max number of sessions per host.

volumesessions  12    12    3     Max number of sessions per volume.

membersessions  4     4     1     Max number of sessions per member per volume.

Yes, why not getting it  to its maximum volumesessions=12 and membersessions=4, each volume won’t spread across more than 3 array boxes anyway, and the new firmware 5.0.2 allows 1024 total sessions per pool, that’s way way more than enough. So say you have 20 volumes in a pool and 10 ESX hosts, each having 4 NICs for iSCSI, that’s still only 800 iSCSI connections.


Update Jan-21-2011

Do NOT over allocate membersessions to be greater than the available iSCSI NICs, I encountered a problem that allocating membersessions = 4 when I only have 2 NICs, high TCP-Retransmit starts to occur!

To checkup if Equallogic MEM has been installed correctly, issue

C:\>setup.pl –query –server=10.0.20.2
You must provide the username and password for the server.
Enter username: root
Enter password:
Found Dell EqualLogic Multipathing Extension Module installed: DELL-eql-mem-1.0.
0.130413
Default PSP for EqualLogic devices is DELL_PSP_EQL_ROUTED.
Active PSP for naa.6090a078c06ba23424c914a0f1889d68 is DELL_PSP_EQL_ROUTED.
Active PSP for naa.6090a078c06b72405fc9b4a0f1880d96 is DELL_PSP_EQL_ROUTED.
Active PSP for naa.6090a078c06b722496c9c4a2f1888d0e is DELL_PSP_EQL_ROUTED.
Found the following VMkernel ports bound for use by iSCSI multipathing: vmk2 vmk3 vmk4 vmk5

 One word to summarize the whole thing: “FANTASTC” !

 More about VAAI from EQL FW5.0.2 Release Note:
 

Support for vStorage APIs for Array Integration

Beginning with version 5.0, the PS Series Array Firmware supports VMware vStorage APIs for Array Integration (VAAI) for VMware vSphere 4.1 and later. The following new ESX functions are supported:

•Hardware Assisted Locking – Provides an alternative means of protecting VMFS cluster file system metadata, improving the scalability of large ESX environments sharing datastores.

•Block Zeroing – Enables storage arrays to zero out a large number of blocks, speeding provisioning of virtual machines.

•Full Copy – Enables storage arrays to make full copies of data without requiring the ESX Server to read and write the data.

VAAI provides hardware acceleration for datastores and virtual machines residing on array storage, improving performance with the following:

•Creating snapshots, backups, and clones of virtual machines

•Using Storage vMotion to move virtual machines from one datastore to another without storage I/O

•Data throughput for applications residing on virtual machines using array storage

•Simultaneously powering on many virtual machines

•Refer to the VMware documentation for more information about vStorage and VAAI features.


Update Aug-29-2011

I noticed there is a minor update for MEM (Apr-2011), the latest version is v1.0.1. Since I do not have such error and as a rule of thumb if there is nothing happen, then don’t update, so I won’t update MEM for the moment.

Finally, I wonder if MEM will work with vSphere 5.0 as the released note saying “The EqualLogic MEM V1.0.1 supports vSphere ESX/ESXi v4.1″.

Issue Corrected in This Release: Incorrect Determination that a Valid Path is Down

Under rare conditions when certain types of transient SCSI errors occur, the EqualLogic MEM may incorrectly determine that a valid path is down. With this maintenance release, the MEM will continue to try to use the path until the VMware multipathing infrastructure determines the path is permanently dead .


Import VM from previous VMware ESX versions into vSphere ESX 4.1

By admin, September 19, 2010 12:38 am

The following method proved to work even for pre-vSphere ESX servers (e.g., Dinosaurs like 2.5.4) vmdk files and same methodology also worked for True Image Server images.

Steps:

11. Use Veeam’s great free tool FastSCP to upload the original.vmdk file (nothing else, just that single vmdk file is enough, not even vmx or any other associated files) to /vmfs/san/import/original.vmdk. In case you didn’t know, Veeam FastSCP is way faster than the old WinSCP or accessing VMFS from VI Client.
2. Putty SSH into ESX host and change su -, then cd to directory /vmfs/san/import/, then  issue the command “vmkfstools -i original.vmdk www.abc.com.vmdk”

(note: Of course, you can use “-d thin” means thin provisioning, but I won’t recommend it as it’s waste of time and takes 2-3 times longer to convert to version 7, you will see why later)

I would also suggest DO NOT remove the original.vmdk until you have successfully completed the whole migration process.

3. Create a new VM as usual (for example, www.abc.com), when the wizard asked for disk size, just put 1GB (it’s going to be overwritten anyway later) . For best performance, select VMXNET3 during the configuration. (We shall add PVSCSI later, see step 5.)

Now, go back to putty, simply issue “mv www.abc.com* /vmfs/san/www.abc.com/”, it will ask you if you want to overwrite the two default files (www.abc.com.vmdk and www.abc.com-flat.vmdk), say yes to both.

4. Now right click and select Re-config (you must do this, or your VM won’t boot), Select everything and then change everything, including Windows License and Workgroup name, time, etc. Then you can boot this VM and login as usual.  Btw, you will find network is not ready as it’s DHCP, you can change to static IP later, after login, VM sysprep will do all the trick for you and it will also reboot itself and re-configure something more.

5. In order to have ESX 4 newly added PVSCSI for your disk controller, you will need to Add a new disk of say 10MB  and MUST choose a Virtual Device Node between SCSI (1:0) to SCSI (3:15) and specify whether you want to use Independent mode, then change the disk controller to PVSCSI, while keeping the original disk as whatever it is for now.

If you try to add PVSCSI to disk11 controllr without boot the VM, then you will get a famous blue screen BSOD as you haven’t installed or updated the VMware Tools for PVSCSI. Boot the VM, login and let VMTools to install all the necessary drivers for you including PVSCSI and VMXNET3.

Details see:
http://xtravirt.com/boot-from-paravirtualized-scsi-adapter
http://www.vladan.fr/changement-from-lsilogic-paralel-into-pvscsi/

Official from VMware (KB Article: 1010398)

Now shutdown your VM again, go to the original disk controller and change it to PVSCSI and power again. You’ve got it! Simple as that!

Of course, there is always some reason you DO NOT want to use VMware PVSCSI
http://blog.scottlowe.org/2009/07/05/another-reason-not-to-use-pvscsi-or-vmxnet3/

6. You may also want to re-configure the VM using re-configure now, what you need now is to right click the VM and choose “Re-Configure”, but before doing so, you will of course also need to install the corresponding sysprep in Virtual Center first.

For example, install Windows 2003 Sysprep files, you can download the file from

http://www.microsoft.com/downloads/details.aspx?FamilyID=93f20bb1-97aa-4356-8b43-9584b7e72556

Instructions: Run the filename.exe /x and extract the files into a folder, within you will find deploy.cab, extra again to C:\ProgramData\VMware\VMware vCenter Converter\sysprep\svr2003 (This is for ESX 4.1 VMware Converter). You will also need to do the same for C:\ProgramData\VMware\VMware vCenter\sysprep\svr2003 if you want to use sysprep for w2k3 template deployment later.

Use sysprep to edit the computer name, re-enter the Windows activation code and other stuff if necessary.

Now Power-On the VM, and login, it will automatically use sysprep to upgrade everything for you, just relax and watch the whole magical thing to happen, it will reboot the server, once it’s done, the only last step is to change the Display Hardware Acceleration to Full.

7. That’s it! Not yet! After reboot, when I tried to re-configure the IP again, I found

“The IP address you entered for this network adapter is already assigned to another adapter ‘VMware PCI Ethernet Adapter’. The reason is ‘VMware PCI Ethernet Adapter” is hidden from the Network connections folder because it is not physically in the computer.”

Solution:

-         Select Start > Run.

-         Enter cmd.exe and press Enter. This opens a command prompt. Do not close this command prompt window. In the steps below you will set an environment variable that will only exist in this command prompt window.

-         At the command prompt, run this command:
set devmgr_show_nonpresent_devices=1

-         In the same command prompt run this command:
Start devmgmt.msc (press Enter to start Device Manager.)

-         Select View > Show Hidden Devices.

-         Expand the Network Adapters tree (select the plus sign next to the Network adapters entry).

-         Right-click the dimmed network adapter, and then select Uninstall.

-         Close Device Manager.

-         Close the Command Prompt

Actually you would want to Uninstall all the previous NIC Cards just to make sure and have a clear environment.

8. To change back to Uniprocessor for VM

According to Microsoft, “If you run a multiprocessor HAL with only a single processor installed, the computer typically works as expected, and there is little or no affect on performance.” But if you’re like me and just want to be absolutely sure that there won’t be issues, switching back to the uniprocessor HAL in Windows Server 2003 is pretty easy:

-         Make sure you have at least Windows Server 2003 Service Pack 2 installed.

-         Shut down the virtual machine.

-         Change number of virtual processors to 1

-         Power on the virtual machine.

-         In Windows, go to Device Manager -> Computer.

-         Right-click “ACPI Multiprocessor PC” and choose “Update Driver…“.

-         Select “No, not this time” option -> “Install from a list or specific location” -> “Don’t search. I will choose the driver to install.” -> select “ACPI Uniprocessor PC.”

-         Reboot the virtual machine.

9. VMware ESX 4 Reclaiming Thin Provisioned disk Unused Space

http://www.virtualizationteam.com/virtualization-vmware/vsphere-virtualization-vmware/vmware-esx-4-reclaiming-thin-provisioned-disk-unused-space.html

The summary of the solution is to use sdelete & Storage Vmotion on the virtual machine to free up that unused space.

That’s all!!! You have just successfully imported or migrated a VM from a previous old ESX version to the latest ESX 4.1 and this method should work for all ESX versions, and what’s best, you upgraded all your existing VM to VMware Version 7 with PVSCSI and VMXNET3 enhanced drivers that you can really take the benefits with technology like vStorage/VAAI/Veeam Change Block Tracking (CBT), etc.

That’s all, for more info about Import or Convert VM into ESX, see

http://blog.lewan.com/2009/12/22/vmware-vsphere-using-vmware-converter-to-import-vms-or-vmdks-from-other-vmware-products/

10. To extend disk in real-time without downtime for Windows Server 2003/2000. (Windows 2008 has the magic build, you can expand/strink the partition on the fly)

a. You can use Diskpart to extend any non-bootable partition (e.g. , D:\) on the fly. *Need to disable Page file first!!!
b. You can use Dell’s Extpart to extend bootable partition (e.g., C:\) on the fly under ONE CONDITION, the extended partition need to be RIGHT-BEHIND C:\ partition. (You can use Acronis Disk Director’s Rescue Media to do this)


Update:

I found sometimes when importing an old VMDK file or Acrnois image, the default disk controller is IDE, which you definitely need to change it to SCSI for much better performance.

Converting a virtual IDE disk to a virtual SCSI disk (KB Article: 1016192)

To convert the IDE disk to SCSI:
1.Locate the datastore path where the virtual machine resides. For example:

/vmfs/volumes/

2.From the ESX Service Console, open edit the primary disk (.vmdk) in a text editor.
3.Look for the line:

ddb.adapterType = “ide”

4.To change the adapter type to LSI Logic change the line to:

ddb.adapterType = “lsilogic”

To change the adapter type to Bus Logic change the line to:

ddb.adapterType = “buslogic”

5.Save the file.
6.From VMware Infrastructure or vSphere Client
a.Click Edit Settings for the virtual machine.
b.Select the IDE virtual disk.
c.Choose to Remove the Disk from the virtual machine.
d.Click OK.

Caution: Make sure that you do not choose Remove from disk.

7.From the Edit Settings menu for this virtual machine:
1.Click Add > Hard Disk > Use Existing Virtual Disk.
2.Navigate to the location of the disk and select to add it into the virtual machine.
3.Choose the same controller as in Step 3 as the adapter type. The SCSI ID should read SCSI 0:0.

8.If a CDROM device exists in the virtual machine it may need to have the IDE channel adjusted from IDE 0:1 to IDE 0:0. If this option is greyed out, remove the CDROM from the virtual machine and add it back. This sets it to IDE 0:0.

PCCW 100Mbps Fiber Broadband

By admin, September 18, 2010 3:32 pm

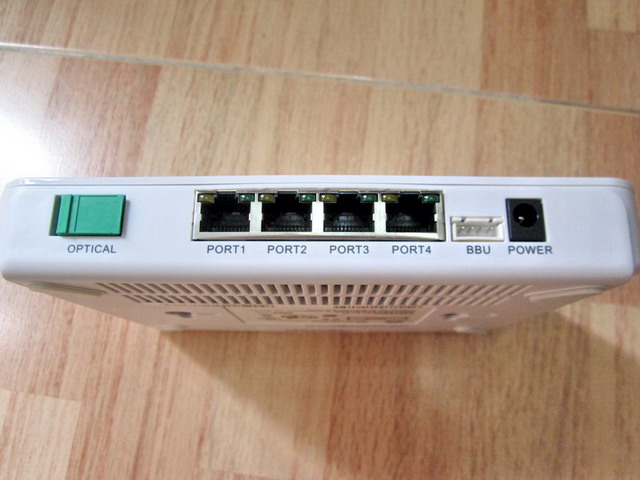
Today PCCW come to my place to install PCCW 100Mbps FTTH Fiber Optics for FREE! :)

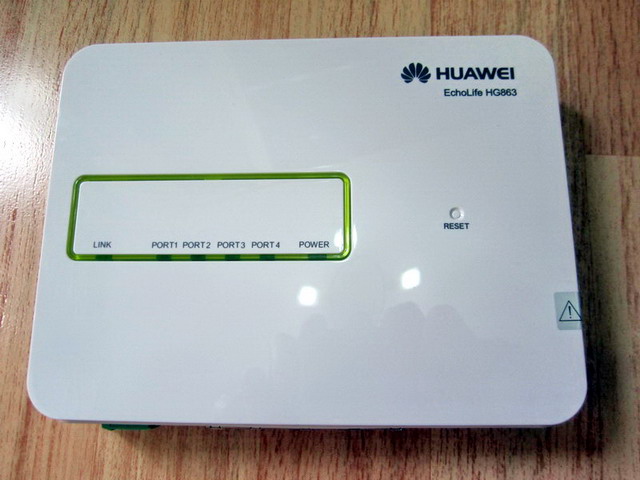
It did take the whole team of 4 staff 3 hours to finish the testing and QC, now I have two 100Mbps broadband at home, one is PCCW (Fiber), the other is HKBN (RJ-45) and both can reach upload/download at 100Mbps. During the setup, PCCW staff used WebUI login to HuaWei HG863 and I asked if there is any special tunning I can do to increase performance or add feature, the answer is Not Much.

Shortly after, I am going to use Netscreen 5GT dual-home feature to combined the two for load-balancing and failover.

IMG_2765

IMG_2766

IMG_2764


根據跨國業界組織「光纖到戶協會」(Fiber-to-the-Home Council)於二○一○年二月發表的資料顯示,本港光纖到戶及光纖到樓服務的住戶滲透率(即使用兩類服務的住戶佔住戶總數的比例)為百分之三十三,全球排行第三,僅次於南韓和日本。部分亞洲其他地區有關的住戶滲透率如下:

    地區   光纖到戶及光纖到樓的住戶滲透率
    ──   ───────────────
    南韓     百分之五十二
    日本     百分之三十四
    台灣     百分之二十四

Equallogic takes time to kick in the additional paths under Windows MPIO

By admin, September 17, 2010 4:02 pm

I’ve spent almost 4 hours on-phone from mid-night to 4am in the morning trouble shooting with Dell Equallogic Consultants in US via WebEx today.

eqlpsAs we found the EQL I/O testing performance is low, only 1 path activated under 2 paths MPIO and disk latency is particular high during write for the newly configured array.
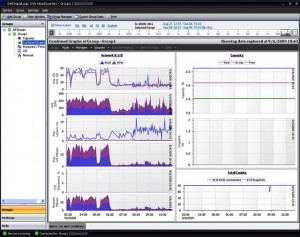
It was finally solved because we forgot the most fundamental concept after all that is Equallogic takes time to kick in the additional paths under MPIO!!! You need to wait say at least 5 mins to see the rest paths kick in.

The followings are my findings and mostly email exchange with Equallogic support. yes, it is long and boring to many, but it’s extremely useful for some who are seeking the same solutions for this problem, I wish someone put it on their blog previously, then I could sleep much better last night.

Timeline as in Descending Order:

- 2pm

We found a very interesting fact that the 2ND LINK WILL ONLY KICK IN AFTER THE 1ST LINK BEING SATURATED/OVERLOADED for a period of time, see 1.gif and 2.gif, So MPIO with Dell EqualLogic DSM (not using Microsoft Generic DSM) is actually working perfectly now and before!

1.gif showing both links are activated, I saw the 2nd link (EQL Mgt 2) suddenly kicked in (may be we opened more copy windows to iSCSI target) and it dropped out again and then come back again when needed.

2.gif shows the performance of the two active ports on EQL Iscsi target also increased by a lot. (From 45% to 80%)

So I can pretty sure the issue doesn’t exist right from the beginning, it just TAKES TIME FOR THE REST NICs (LINKs) to be activated gradually over the testing period and according to loading situation automatically. Previously, we only tested for less than 2 mins, in other words, we didn’t give enough time for MPIO intelligent logic to kick in additional paths for throughput or I/O.

- 12pm

See attached TR1036-MPIO_EQLX-DSM.pdf PS Series Best Practices
Configuring and Deploying the Dell EqualLogic™ Multipath I/O Device Specific Module (DSM) in a PS Series

MPIO DSM Load-Balance Policy

Microsoft MPIO DSM allows the initiator (server) to login multiple sessions to the same target (storage), and then aggregate that into a single device. Multiple target sessions can be established using different NICs to the target ports.

If one of the sessions fails, then another session continues to process I/O without interrupting the application.

Dell EqualLogic MPIO DSM supports following balancing policies.

• Fail Over Only: Data is sent in one path, while other paths are standby. This connection is used for routing data until it fails or times out. If the active connection fails, then one of the available paths is chosen until the former is available. This load balancing policy is the default configuration when MPIO DSM is disabled.

• Round Robin: All available paths are used to perform I/O in a rotating sequence (round robin sequence). There is no disruption in sending I/O even if any of the paths fails. Using this policy, all paths are used effectively.

• Least Queue Depth: I/O is sent to the path that has least queue length. The performance analyses for the above load balancing policies are presented in the following sections.

• EQL recommend to use Microsoft DSM with “Least Queue Depth” load balancing policy on Windows Server 2003/2003

• To fully utilize Microsoft’s MPIO capabilities, Dell EqualLogic provides MPIO DSM that is complementary to ASM for both high availability and performance.

- 11am

I found something very important on google.

Device Initialization Recall that MPIO allows for devices from different storage vendors to coexist, and be connected to the same Windows Server 2008 based or Windows Server 2003 based system. This means a single Windows server may have multiple DSM’s installed. When a new eligible device is detected via PnP, MPIO attempts to determine which DSM is appropriate to handle this particular device.

MPIO contacts each DSM, one device at a time. The first DSM to claim ownership of the device is associated with that device and the remaining DSMs are not allowed a chance to press claims for that already claimed device. There is no particular order in which the DSMs are contacted, one at a time. The only guarantee is that the Microsoft generic DSM is always contacted last. If the DSM does support the device, it then indicates whether the device is a new installation, or the same device previously installed but which is now visible through a new path.

Does this means if we see multiple DSM in MPIO, DELL Equallogic will be always used first or it’s priority is always higher than MS DSM?

- 10am

Some update I found: Even I added back with mpclaim -r -i -d “MSFT2005iSCSIBusType_0×9″

MPIO is still showing Dell Equallogic is the DSM instead of Microsoft, how can I force MPIO to select Microsoft instead of Dell Equallogic as desired? That exactly explained why there is ONLY ONE PATH (or NIC) working at the same time, but not load balancing across two NICs.

I even did a real time test, by Disabling a NIC, then all traffic automatically shifted to the 2nd NIC (or path) and vice versa. So seemed Windows Server 2008 R2 doesn’t understand Dell Equallogic DSM for MPIO. In other words, if Dell Equallogic is the DSM, then only one path is available.

I also find out from Google, that Windows Server 2008 DOES NOT add “MSFT2005iSCSIBusType_0×9″ automatically like in Windows Server 2003, we need to add it manually from MPIO GUI or CLI.

See the output.

C:\Users\Administrator>mpclaim -s -d

For more information about a particular disk, use ‘mpclaim -s -d #’ where # is
he MPIO disk number.

MPIO Disk System Disk LB Policy DSM Name
——————————————————————————-
MPIO Disk0 Disk 2 RR Dell EqualLogic DSM

C:\Users\Administrator>mpclaim -s -d 0

MPIO Disk0: 02 Paths, Round Robin, ALUA Not Supported
Controlling DSM: Dell EqualLogic DSM
SN: 6090A078C06B1219D3C8D49CF188CD5B
Supported Load Balance Policies: FOO RR LQD

Path ID State SCSI Address Weight
—————————————————————————
0000000077070001 Active/Optimized 007|000|001|000 0
0000000077070000 Active/Optimized 007|000|000|000 0

C:\Users\Administrator>mpclaim -r -i -d “MSFT2005iSCSIBusType_0×9″

So the KEY question is how can we FORCE MPIO DSM TO USE Microsoft instead of Dell Equallogic?

- 9am

1. Removed MPIO from W2K8 Feature, reboot, then remove HIT, reboot, and re-installed again, reboot, under MPIO, still no MSFT2005iSCSIBusType_0×9.

2. This time, I changed the NIC’s Flow Control to TX & RX and reading performance of EQL also increased to 99%.

I do think we need to enable Flow Control RX as well, as we saw yesterday, only writing to EQL is working at 99%, but reading from EQL is at 20%, so this proved it’s required.

3. Also, disk latency for read is very small (39ms compares to 350ms for write) when we saturated the link using multiple 16GB files, however, writing to EQL and overloading the link still gives us over 300ms disk latency. Those high number of Re-transmit % all went down from 5-6% to 1-2%.

4. No more MPIO initiator dropping out problem even without MSFT2005iSCSIBusType_0×9 in place, it may not be necessary after all?
As I installed HIT twice, MSFT2005iSCSIBusType_0×9 is not there as always, I suspect manually adding it can actually cause more problem? Or shall I remove MPIO from W2K8 Feature and just install it again manually to see if MSFT2005iSCSIBusType_0×9 pops up?

Extra Notes:

MPIO CLI Comands

mpclaim -r -i -d “MSFT2005iSCSIBusType_0×9″
(Note: HIT installation on Windows Server 2008 R2 DID NOT add this to MPIO)

mpclaim -s -d

mpclaim -s -d device_name

mpclaim.exe –v C:\Config.txt

C:\Users\Administrator>mpclaim -s -d

For more information about a particular disk, use ‘mpclaim -s -d #’ where # is
he MPIO disk number.

MPIO Disk System Disk LB Policy DSM Name
——————————————————————————-
MPIO Disk0 Disk 2 RR Dell EqualLogic DSM

C:\Users\Administrator>mpclaim -s -d 0

MPIO Disk0: 02 Paths, Round Robin, ALUA Not Supported
Controlling DSM: Dell EqualLogic DSM
SN: 6090A078C06B1219D3C8D49CF188CD5B
Supported Load Balance Policies: FOO RR LQD

Path ID State SCSI Address Weight
—————————————————————————
0000000077070001 Active/Optimized 007|000|001|000 0
0000000077070000 Active/Optimized 007|000|000|000 0

C:\Users\Administrator>mpclaim -r -i -d “MSFT2005iSCSIBusType_0×9″

Equallogic and ESX 4.1 iSCSI Setup Crack Sheet

By admin, September 16, 2010 7:17 pm

sanhqFor the whole month, my mind is full of VMWare, ESX 4.1, Equallogic, MPIO, SANHQ, iSCSI, VMKernel, Broadcom BACS, Jumbo Frame, IOPS, LAG, VLAN, TOE, RSS, LSO, Thin Provisioning, Veeam, Vizioncore, Windows Server 2008 R2, etc.

It’s definitely like taking an extremely fast track in getting my enterprise storage degree, and after all, it worths every penny of struggling, many long nights, endless calling to Pro-Support in Hong Kong and US EQL supports.


Equallogic and ESX 4.1 iSCSI Setup Crack Sheet to save you typing many commands.

  1. Configure iSCSI vSwitch using GUI first and assigned multiple NICs onto the vSwitch, in my case, it’s 4 NICs.
  2. Create multiple VMKernel on this vSwitch, in my case, there are 4 VMKernel (named iSCSI 1 to iSCSI 4)
  3. Removed the extra NICs from individual VMKernel by unselecting 3 of those NICs and do this for each VMKernel.
  4. # Enable Jumbo Frame on iSCSI vSwitch using CLI
    esxcfg-vswitch -m 9000 vSwitch4
    esxcfg-vswitch -l to verify MTU=9000
  5. # Enable Jumbo Frame on each VMKernel using CLI
    esxcfg-vmknic -m 9000 iSCSI1 – iSCSI4
    esxcfg-vmknic -l to verify MTU=9000* I also enabled Jumbo Frame for VMotion as well as FT network.
  6. Go to GUI, enable software iSCSI and note down the vmhba #, in my case, it’s vmhba47.
  7. # Bind VMKernel to iSCSI Adpater using CLI
    esxcli swiscsi nic add -n vmk2 -d vmhba47
    esxcli swiscsi nic list -d vmhba47 to verify if all 4 NICs are binded with vmhba47
  8. Do a rescan of the Storage, you will see EQL volume now. Please make sure you checked “Allow Simultaneous Connection…” under EQL volume property, or multiple ESX connection to the same volume won’t work.
  9. To verify from EQL, go to group manager, then click that volume, now you see there are 8 connections with 8 different IP Addresses (ie, 2 ESX hosts, with 4 NICs each)
  10. To verify from ESX host side, go to storage, right click Manage Path, you will see there are 4 IP Addresses from EQL.


Just got a reply from Equallogic support team regarding my customized configuration.

The document on the web site is the supported method of setting Jumbo Frames on the switch. This is the method that we have tested and confirmed to work.

Of course, as with many things, there is typically a method of doing this through the GUI as well. The method you are following appears to work in my tests as well, but we cannot confirm if it is a viable operation as it has not been tested through our QA process.

My suggestion would be to utilize the tested method. You may also want to check with VMware directly as it is possible that the GUI method you are utilizing simply calls the CLI commands we provide, but we cannot confirm that for certain (we do not have access to their code).

(Name Removed)

Enterprise Technical Support Consultant
Dell EqualLogic, Inc.


Finally, test ping your destination with a large message and specify don’t fragment.

  • Linux VMs:         ping –M do –s 8000 <ip address or destination>
  • Windows VMs:    ping –f –l 8000 <ip address or destination>
  • ESX(i):                vmkping –d –s 8000 <ip address or destination>

Dell Poweredge R710 iSOE key DDR3L Broadcom Quad NICs

By admin, August 27, 2010 12:09 pm

Finally I’ve got time to inspect each individual part thoroughly and the following is my findings. 

  1. Dell Powerdge iSCSI Offload Key for LOM NICs. Strange funny little stuff that makes a hell lot of difference for some people. Broadcom charges this for extra on their 5709 NICs (5709C not 5709S), the same apply to HP Pro-liant NICs.According to one of the EQL engineer we talked to, it is still best NOT TO use 5709C as ISOE HBA in ESX4.1 as it will lost Jumbo Frame feature and some other nice features will be gone if HAB mode is used with EQL boxes.IMG_2728

    IMG_2729

  2. DDR3 Low Voltage ECC+Buffer R-DIMM 8GB by Samsung: It’s nice to have that 20% saving, but when you add 2DPC, your nice 20% power saving (ie, 1.35V) will be disabled automatically (ie, raise to 1.5V instead), good part is you still have that 1333Mhz bandwidth with 2DPC. DDR3L 1.35V will only apply when it’s in 1DPC mode.IMG_2735What about 3DPC? Old story applies, it’s 800Mhz, tested it and proved it and if populate with 3DPC and fully filled that 18 DIMMs (ie, 144GB), it will take twice the time to verify and boot the server, so it’s better not to as you lost 40% bandwidth is very important for ESX.

    IMG_2736

    Dell’s on-line documentation has no where indicates my findings and my findings completes what I found at HP’s resources previously. Btw, why does DDR3L still need that aluminum cap for heat dissipation if it’s voltage is really that low?

    More about Samsung’s DDR3 Low-Voltage Ram

  3. Broadcom NetXtreme II 5709 Gigabit NIC w TOE & iSCSI Offload, Quad Port, Copper, PCIe-4: Nice to have two of this besides the embedded quad NICs, so total you will have 12 NICs within one server. The chipset is still BCM5709CC0KPBG, there is no iSCSI key found on the NIC, guess it’s been embedded already as well.IMG_2732

    IMG_2730

Some of my findings from past 2 months research

By admin, August 9, 2010 11:21 pm

The new Virtual Data Center project has been keeping me really busy, the followings are some of my findings.

  • Learn that R810/M910 with 4 sockets will only use 1 memory controller instead of two, memory bandwidth will be cut by half, that sucks! Strange enough, when R810 populates with 2 sockets only, it will use both memory controllers and gain access to all 32 DIMMS. So R810/R910 is still best for 2 sockets server, that why we switch to R710 instead after read the benchmarking, it’s a waste of money to go for R810.
  • DDR3L low voltage (1.35V), we populate with 2 DPC (8GB x 12 DIMMS), guess what? Voltage will shoot to normal 1.5V! and no one at Dell pre-sales or pro-support can answer us this, I found out this fact from HP’s resources, ridiculous! Anyway, it’s still running at 1333Mhz, that’s a bless.
  • Equallogic PS6000XV 15K should be a monster, we will only be worried about adding front-end (like R710/R720/R730) and adding back-end PS6000XV/PS7000XV etc. in the future, that’s main selling point for this solution, scalable beyond imagination, this really is the whole motivation we selected EQL boxes.
  • With the release of vSphere 4.1, VAAI, iSCSI Off-load fully support on Broadcom 5709 but no Jumbo Frame, what the heck! EQL vStorage off-load improvement, Multipath plugin (EQL finally solved the big problem)
  • One box of PS6000XV is good enough for 4Gbps, absolutely no need to go for 10Gbps for the time being except you are aiming for that 200M/s increase (yes, it can only reach 650M/s at max, there is no way reaching 1000M/s in reality. We were also told by paying about 1/4 of the box, you can always upgrade to 10Gbps version of PS6010XV in the future, but for our environment, IOPS is way demanding than thoughput, so 4Gbps is more than enough, just get a PowerConnect 5448 with 48 ports, we should have lots of space to grow from here.
  • There is a special iSCSI Key need to be purchased in order to have TOE+iSCSI Off-load on R710, this is the same on HP Proliant servers.
  • Found HP Proliant’s server resources are much more professional than Dells’, but Dell’s stuff are a lot cheaper (1/3 at least), so we just have to live with that.
  • In ESX 4 or above, Thick provisioning is always recommended for performance concerned VM applications, it’s a lot faster.
  • Talked to two of the local IDC who’s going to start a cloud business, but their core technical team doesn’t seem to know what they are really doing, seemed they have a long way to go comparing with US counterparts.
  • Again, virtualization is the future and you need a good SAN to support it!
  • Talk to your inside sales manager, show your sincerity, you will be rewarded and get unbelievable discount at quarter end!
  • Dell’s EQL expert is really helpful and resourceful, thank you so much! You are really the super-hero, kick-ass type!

Current Project: VMWare vSphere with Equallogic iSCSI SAN

By admin, April 25, 2010 11:39 pm

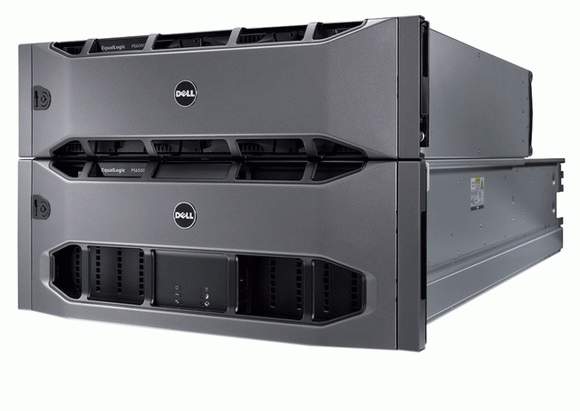
Currently I am involving in a massive virtualization project that I am responsible for transforming and restructuring client’s 10 years old enterprise datacenter into something Much GREEN, mainly using VMWare’s vShpere and Dell Equallogic iSCSI SAN as the their major storage solution. Each node will be deployed on the latest Dell Poweredge R815 powered by AMD’s 12-core “Magny-Cours” Opteron with 128GB memory on each server, latest technology like DRS/HA/FT/vStorage/DPM making a long time dream comes true finally. 

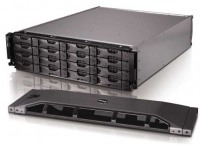
ps6000-storage-stack-left-powerpoint

Recently, I find myself can’t live without virtualization more and more, for example the above will result in consolidating 10 racks to 3 servers and 2 Equallogic 6000 series boxes occupying half rack only with much reliable fault tolerance and failover as well as at a fractional cost than before, just think about the electricity and rack space saving alone, making virtualization irresistible!

32-Cores on a standard 2U server is no longer a dream

By admin, March 22, 2010 11:09 pm

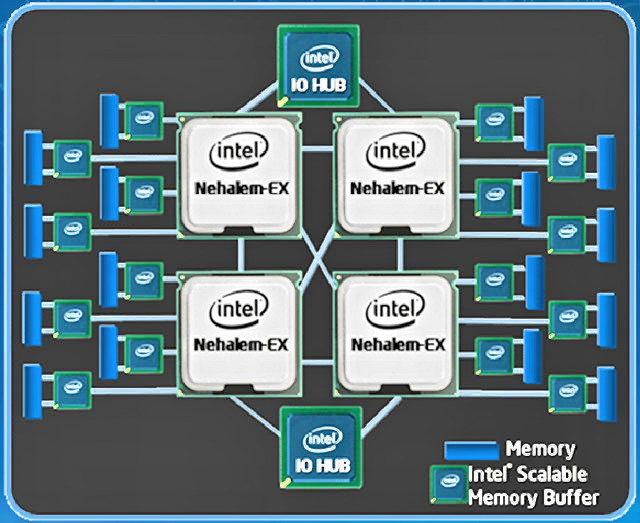
With the new release of Intel’s latest Xeon CPU (Nehalem-EX) for the enterprise market, 32-Cores on a standard 2U server is no longer a dream. Think about what you can do with 32-Cores (64-Cores counting the HT) and 128GB Ram in a standard 2U for your next virtualization project! Get it? Yes, you could put almost the whole mini data center (that’s 1998 standard, say 128 servers, each with PIII 1G with 1G Ram per server) on to it, see the cost saving? Bingo!!!

intel_nehalem-ex-4-core

The New Nehalem-EX Advantage:

  • Intel Nehalem Architecture built on Intel’s unique 45nm high-k metal gate technology process
  • Up to 8 cores per processor
  • Up to 16 threads per processor with Intel® Hyper-threading
  • Scalability up to eight sockets via Quick Path Interconnects and greater with third-party node controllers
  • QuickPath Architecture with four high-bandwidth links
  • 24MB of shared cache
  • Integrated memory controllers
  • Intel Turbo Boost Technology
  • Intel scalable memory buffer and scalable memory interconnects
  • Up to 9x the memory bandwidth of previous generation
  • Support for up to 16 memory slots per processor socket
  • Advanced RAS capabilities including MCA Recovery
  • 2.3 billion transistors
Pages: Prev 1 2 3 4 5 6 7 ...22 23 24 25 26 27 28 Next